Showing posts with label DIY. Show all posts

Friday, 22 July 2011

Chair Recovery

Happy weekend friends!  I'm curled up in my favourite spot by the fire, in my new (old) favourite chair, which I've been desperate to share with you all.
Today I'm linking up to the fabulous Miss Mustard Seed's Furniture Feature Friday.  Please check it out - you'll find some amazing ideas by talented people!

I purchased two of these chairs for $1 on Trade Me.  They were in ok condition, until my boys started picking at the already frail upholstery - much to my annoyance.  Look what they did!


None of those holes were present at time of purchase.  What is with boys?  By the way, see that messy room in the background... it has had a transformation!  But that's for another post...


This is a "progress" shot.  I was ecstatic to get to this point... until I turned around and saw the other chair waiting for it's turn.  That's the problem with doing two of anything... it takes twice as long!


It was actually great fun making slipcovers for my comfy chairs.  I followed Miss Mustard Seed's video tutorial series on slipcovers.  Miss Mustard Seed is a mum of preschoolers - and therefore finds the quickest way to do things.  I appreciate that.  So.  Much. 
I'd like to point out that this is not a project for a beginner sewer.  Make a few cushion covers first.  I've been sewing since I was 11, and have made cushions, curtains, costumes, clothing, you name it.  So long as it starts with "C", of course. 
I used painter's dropcloths (new, obviously) from Bunnings Warehouse.  They were a total steal at 2 for $45.  I took one for the team and washed them first - an unusual display of caution and self-control.  I far prefer to rip into a project with reckless abandon, only to abandon it before completion.  It's how I roll.

Here's chair number one, in my cosy fireside spot...


I love sitting here, it's the warmest place in the house.  The picnic basket and duck aren't always there, that's one of the random factors of photography with children. 
The green fabric was from Nick's Fabrics, and heavily discounted.  It's beautiful quality, thick, quilted, and a pain in the butt to sew.  I broke 3 denim needles putting the piping in.  Totally worth it though!


Here's chair number two.  All cosied up next to the bookshelves Mr Leota built.  He's very clever.  If I'm awake at odd hours in the night, this is where I sit and read.  Our friend Pete made the deer's head.  One day it will most likely go in the boy's room, but I'm enjoying it propped up there for the moment.
Have a lovely weekend everyone - keep warm all you southern hemisphere dwellers!
  

Saturday, 21 May 2011

Laundry & Other Challenges

For the first time, I'm joining a linky party!  I love the Freckled Laundry... and this weekend's party is all about textiles.  Hence the title of my post.  Does folding your own weight in laundry count as "textile related"?  It sure isn't very creative, I can tell you.  Apart from folding the queen-sized fitted sheet from my bed.  That requires a high degree of creativity. 
Apart from folding 7 day's laundry in 1 evening, I've also tackled a bit more sewing this weekend.
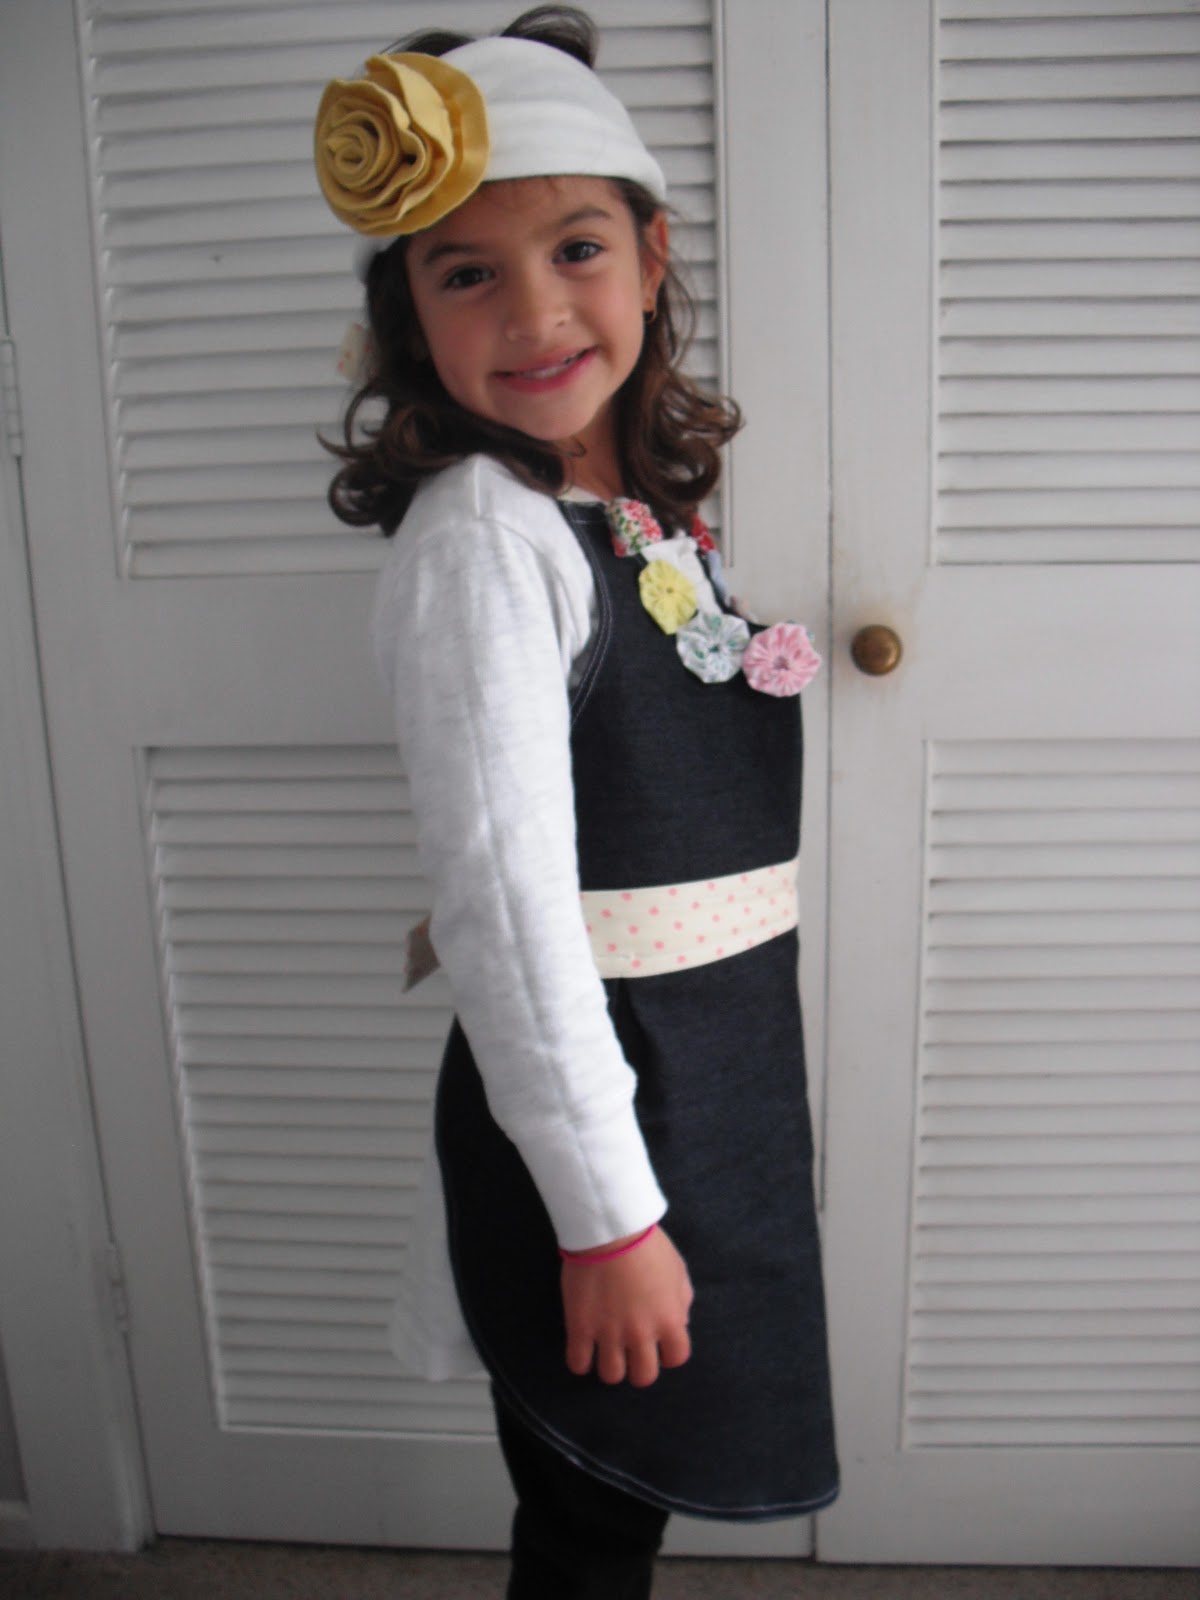
This cute person was on her way to an Ice-Skating party...


And of course, we needed a special gift for her sweet friend.  Turning 7 is a big deal.  My 6-year-old is already planning her party.  She turned 6 at the end of March.


Here's one excited party-goer modelling the gift I whipped up - a rib headband with yellow rib flower, and a handy-dandy apron for baking with Mum.  Complete with yo-yos for crafty style.


I've had this apron in mind for some time now.  I wanted a curved neckline and curved hem.  It's hard to see on the denim, but there are two little pleats along the waistline for shape. 


This is the best close-up I got. 


I didn't have time to tie it up nicely - we had to get to the party!

Tuesday, 5 April 2011

Miss 5 Turns 6

Here's a little something I threw together... literally, in less than a week!  I was keen on a sweet, simple tea party, not many children, raspberry lemonade in the teapot.  But my girl was totally into this cute party from The Tortoise and The Hare, and had her heart set on a Supergirl Party. 
She invited six close friends, rather than the usual 12 or so... we asked them not to bring gifts.  I made them all capes, and they decorated their own masks before heading off on a secret mission... to rescue someone very special. 
Decorating masks
Searching for clues in the big rescue
The rescue mission included hidden easter eggs...
...and it led them right down the garden path
And eventually found...
a brand new friend!
What party is complete without a cake covered in lollies?


Did you like the bunny?  He was a gift from our lovely friends Spike and Dizzy (not their real names, obviously, but that's what we all call them!).  Spike and Dizzy got married recently, I'm going to do some posts about their beautiful wedding. 
You may have noticed Spiderman was there... my boys weren't having anything to do with their capes!  After the party, Spiderman changed his mind and asked me for his cape.  Typical.
The boy's capes are denim, the girls are from whatever fabrics I had lying around.  I made the decision to raid my stash rather than buy in (although I was sorely tempted). 
Sometimes limitations force creativity to blossom in unexpected ways.
Goodnight, lovely little cyber friends xxx

Monday, 7 March 2011

At Last!

Here we go... the big reveal - from "coffin" to Coffee...


Yep, the drawer inserts are cut-up coffee sacks.  Cool aye?
I LOVE this look - it's so fresh yet rustic and loved-looking at the same time.  Not bad for a cheap coffee table - really, the only reason we bought it was for the handy drawers.  Storage.  I love storage.  And now, I have classy storage - so happy. 
My camera is being very blurry right now - I'm working on it.  There's a 98 3/4% chance it's operator error.

Wednesday, 2 March 2011

Coffee Table

Hi friends!

Here are some photos of our coffee table... this is what it looked like (minus the dings and scratches) when we bought it 6 years ago.  Mr Leota never liked it.  He called it the coffin table and told me I must never put flowers on it.  I complied. 
Ok, in all truth, this is what it looked like after I'd been sanding for 3 hours... please excuse my messy living room.  You'll observe the sander case in front of the sofa.  After endless hours of sanding by hand, my lovely friend Cherie came to my rescue with an electric sander.  Then Mike the builder came to my rescue by sanding the top for me.  He can hold the sander with one hand - I cannot.
This is it once the sanding was done...


Once I'd spent the best part of 2 days sanding it, I almost wanted to hiff it out the picture window.  But self-control prevailed!  The next step was much more fun...


A coat of very watered-down acrylic house paint... only used one test pot for the whole table.  It soaked in really nicely, so the woodgrain still showed through.  Mr Leota wanted me to leave it like that, but I couldn't help myself, I HAD to dry-brush it white.  You can see, in the above photo, I had already started.  I have no photos of it just grey.  Impatience - that's all I can put it down to.


Painting finished... I used a water-based enamel for the white paint. 
a) because I had it
b) our coffee table takes some hard knocks

Then I finished off with a light sand...


You'll have to wait for the big reveal... I haven't taken the finished pictures yet.  And yes, I finished it in January!  Bet you can't wait to see what I did to those drawer fronts...